Instructions:
I love day-dreaming and always in my "mode of imagination". To make my imagination comes true, I create them into handcrafted artworks. Most of my artworks were being created with mixed media technique. Wood, found objects, wire or clay are my favorite materials. I think that people need to be able to enjoy different artworks in various forms and structures by utilizing practicality and functionality concepts. Hope they will bring more joy into your life:)
Monday, August 15, 2011
Project #011. Simple Succulent Art
Instructions:
Thursday, May 12, 2011
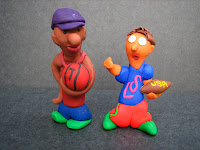
Project #010.Craft Clay- Mini Sculptures
Sunday, May 8, 2011
Project #009.Block Printing

Among all of the techniques that I learned from printmaking, I like the linoleum block printing most. For me, the most challenging part of making a linoleum block printing, is how to present the design/image on the block. Linoleum block print is a good experience to duplicate an image into difference colors. It is really a pleasure to learn about block printing, all you need is just some patient and passion @(^^)@
Friday, April 15, 2011
Project #008.Monoprint


The printing process involved in making a monoprint is named such because only one print is made at a time.
Things you'll need: Plexiglas, brushes, wooden sharp tools like tooth stick, pencil or sharp branches), watercolor paper/card stock, printing ink, roller and wooden spoon/press machine.
Project #007.Wire Sculpture
Friday, April 8, 2011
Sunday, April 3, 2011
Project #006. Wire Art
Before I saw the wire art work from Bart Soutendijk, I never thought that wire can be used as a skatching tool.
I like his wire art - simple line that mean everything.
So I try to make some images that I like most from his wire work.
Here is his website : http://www.wirewallart.com/
Monday, March 14, 2011
Project #005. Recycle Paper Coastal
2. Repeat it until the thickness of the coastal that you wanted.
3. For the last fold, please reference the step as the pictures below :))
**multi-purpose glue was used for the last fold.
4. After finished all the paper strips, you may start to design the pattern of your first handmade cosatal.
Thursday, January 13, 2011
Project #004. Paint With Soft Pastel And Color Pencil
Paint with pastel is a little bit messy, but faster than oil paint and acrylic,
- Sketch the figure with blue color pencil.
- Start from the face, then the body. Use color pencil to draw the detail.
- Fill the background with soft pastel, then the figure. In the same time with applying pastel, you may need some tissue paper or your finger to assist you to get a better effect. Be careful of each applying color. Apply the brighter color first, then the darker one. This will help you to control the effect more confidently.
- Well, it's easy and fun, right?
Monday, January 10, 2011
Project #003. Decorative Lamp-Blossom
I wonder if I could make a special decorative lamp for Christmas. This will have more fun and increase the joy of this season. So I decided to use some simple material to make a unique decorative lamp. The whole idea is come from the shape of flower, that's why "Blossom Lamp" is named.
- Let's make the stand of the lamp first. Wrap the whole branch with teflon tape. Repeat the step for the rest. Arrange the four branches as able to stand itself and tie them with teflon tape.
2. To make the lamp shade. Bend the wire into round shape and wrap with teflon tape. Repeat the rest. Make 12 similar circles. hold them together and tie the center with teflon tape. slowly spread each circle in clockwise direction until it looks like a flower shape.
3. Put the "flower shade" on the stand.
4. The last step is to put on the mini-lights, you may tie the mini-lights on the stand when needed.
Tips:
- Mini-lights is easy to get during Christmas season, and that's many options in types and colors.
- You can replace teflon tape to floral tape.
- You may adjust the length of the branches. It depends you want a table decorative lamp or a floor decorative lamp.
Wednesday, January 5, 2011
Project #002.CD Coastal


Let's your imagination begin...
Things you'll need : old cds, acrylic paint, brushes, hot glue, grove.
- Clean the surface of the cd.
- Use the non-shiny side. Warm up the hot glue before starting to draw with it. slowly applying hot glue on the cd, imagine you are using a pen to draw some nice drawing on the cd. Be extra careful of the hot part of the glue gun, wearing grove is a good idea to protect your hands.
- When the glue dried. Apply acrylic paint on the glue. Adding water is not necessary during cd painting, two or three layers may apply
as your desired. leave it aside and let it dry for about 60 minutes. In the same time, you may start to draw another master piece.
- Hot glue is another idea as a support of the cd. Just apply a small amount of hot glue on the bottom of the cd (as picture shown). You may measure 4 equally angle to get a good balanc
e of support.
- Repeat for the remain cds, so you'll have a series of your own collection coasters.


