Tuesday, January 31, 2012

My Shop at Etsy is Open Now!


Greeting to everyone~

Finally,  my online shop is open on 25 Jan.


Ahhh~


I always dream to open a shop that could display with all my artworks.
A brick- and -wall shop? Maybe not now..... But I am ready for an online shop.


After some online classes and searching.  A website called "Etsy" finally became my priority choice. This is a great website for trading art and craft business.  The most I like about this website is its reasonable fees and easy to set up a new shop. And of couse, their supporting group is strong.


Finally, I have a place to keep all kinds of dream. With "We-imagination" together, I hope this will bring more joy to you.

Thank you for visiting and have a nice day :)

Monday, August 15, 2011

Project #011. Simple Succulent Art

Simple Succulent Art

Succulent plants offer a wide variety of sizes, shapes and colors. They are easy to manage and give your home or office space an instant natural green art. By using succulent to an art project could result an amazing effect. And it could be very fun tough.

I will show you a simple project step by step below:


Graptoveria Succulent Plant


Things You’ll Need:


Succulent plant, 2” plastic container with good drainage, Ceramic pot/mug/bowl that big enough to fix 2” plastic container, Soil mixture, Stone/sea glass/gravel/marbles for top dressing.


 Instructions:

1.     Mix the soil. Succulents grow in mineral-rich soil, but not in pure sand. Soil should be porous and quick draining. Add ¼ to ½ coarse sand, crush lava rock or perlite to your potting mix for porosity and aeration.

2.    Cover the drainage hole at the bottom of the plastic container with a piece of plastic screen or coffee filter, to prevent soil from escaping through the hole.

3.    Fill the plastic container with ¼ soil mixture. Place the succulent in the center of the container, and fill the surrounding with soil mixture. Be sure to position the plant so the foliage extends outward.

4.    Now, place the plastic container in the ceramic mug.

5.    Sprinkle a thin layer of crush rock over the top of the soil for decoration effect. Make sure the crush rock covered the edge of the plastic container.

6.    You have just made yourself a wonderful house/office plant. Yeah~


Tips:

WATER: Allow soil to dry between thorough watering. Do not mist spray plants as this practice encourages shallow roots and weak plants.

FEED: Little fertilizer is needed. Once every month.

LIGHT: Not all succulents are sun-lovers, but non do well in subdued light. Place them near the west window is a great idea to give them a morning “sun bath”. For best result, give them 5 hours of direct morning sun daily outdoor. Avoid direct sun from midday sun.

TEMPERATURE: 65oF – 85oF

Thursday, May 12, 2011

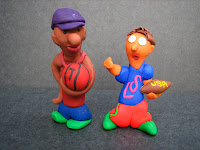
Project #010.Craft Clay- Mini Sculptures


I was thinking about using polymer clay to create some miniatures. Inspired by an artist, Red Groom, I decided to create a series of street scenery.


Sunday, May 8, 2011

Project #009.Block Printing


Among all of the techniques that I learned from printmaking, I like the linoleum block printing most. For me, the most challenging part of making a linoleum block printing, is how to present the design/image on the block. Linoleum block print is a good experience to duplicate an image into difference colors. It is really a pleasure to learn about block printing, all you need is just some patient and passion @(^^)@


For more information about linoleum block printing, please visit the site: http://en.wikipedia.org/wiki/Linocut


Friday, April 15, 2011

Project #008.Monoprint


The first technique that I learned from printmaking class was monoprint. I think monoprint is the easiest one among those printmaking techniques, yet it is fun and just needed a few tools.

The printing process involved in making a monoprint is named such because only one print is made at a time.

Things you'll need: Plexiglas, brushes, wooden sharp tools like tooth stick, pencil or sharp branches), watercolor paper/card stock, printing ink, roller and wooden spoon/press machine.

Project #007.Wire Sculpture


Dealing with wire is always a fun thing for me during my spare time. In this project, I used steel wire to create structures of a rabbit, a carrot and a dragon .


Materials : Chicken wire, pliers, wire cutter, gloves, paper mache.